San Francisco Sourdough
 Growing up in the San Francisco bay area I've always had plenty of access to something this region is quite famous for: tangy sourdough bread. This might explain the fact that, despite being a professional bread baker who works in San Francisco, I almost never make the stuff. I prefer to make a more mild sourdough that is only slightly sour and not as in your face as the kind SF is famous for. I mean, why would I go out of the way to make something that I could go down the street and buy in just about any grocery store? Well normally I wouldn't but this week I got the urge to try my hand at tanginess and to try to make a bread that encapsulates everything that a SF sourdough is and should be.
 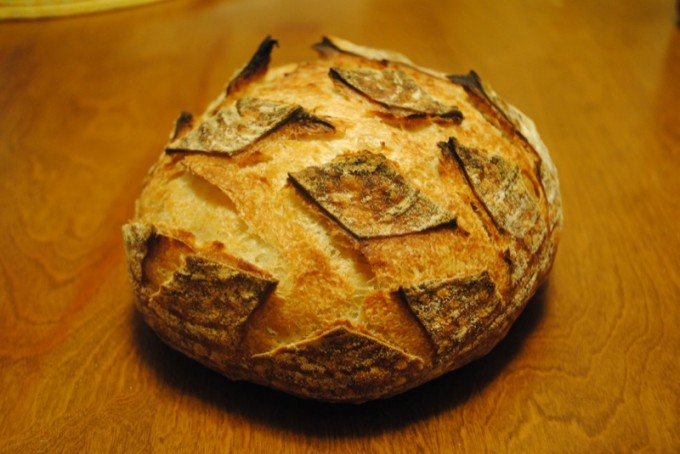 First, let's discuss what I think the qualities of a proper SF sourdough are.
- It must be sour! This is probably the number one defining characteristic of a SF sourdough. The tanginess of the loaf must be the primary flavor coming through when you take a bite. There should be nothing mild about this sourness. It should be in-your-face. On a sourness scale from one to ten it's an eleven. So let's dial it up.
- It's just a plain old white sourdough, nothing more nothing less. This means no includes or flour blending. Nothing but white flour in this loaf(I semi-break this rule in my loaf but it was in the name of more sourness!).
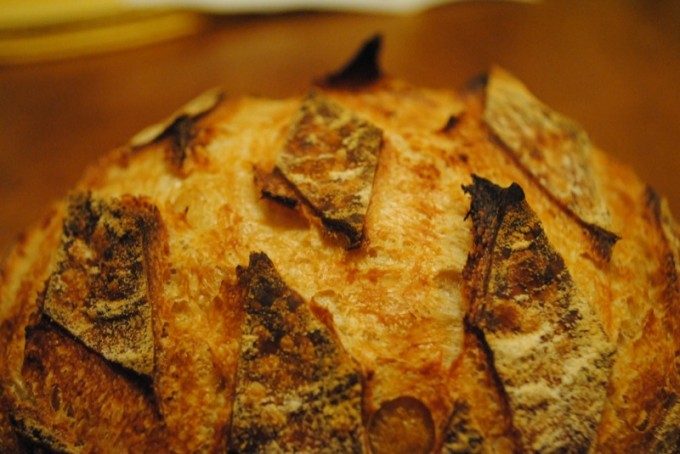
- The crust should be quite blistered. This is when the crust looks like it has tiny bubbles all over the surface of the bread. Just about every SF sourdough I've seen has been extremely blistered. In fact I've met many people who thought that a blistered crust on a bread means it is sourdough and a bread without blisters means that it is not sourdough. This is not the case! Bread blisters come from CO2 slowly leaking from the surface of the dough while it ferments for a long time in a cold fridge. This means that most SF sourdoughs are sitting in cold fridges for a long time while they ferment. Why would the bakers do this? Because it increases sourness!(This will likely be the answer to every why question concerning this loaf).
- It must be shaped round. People may disagree with this one but when I think of SF sourdough I think of the bread sold at the wharf that people like to make soup bowls out of. These breads come round and even though you can order the same bread in different shapes I think of round as the classic.
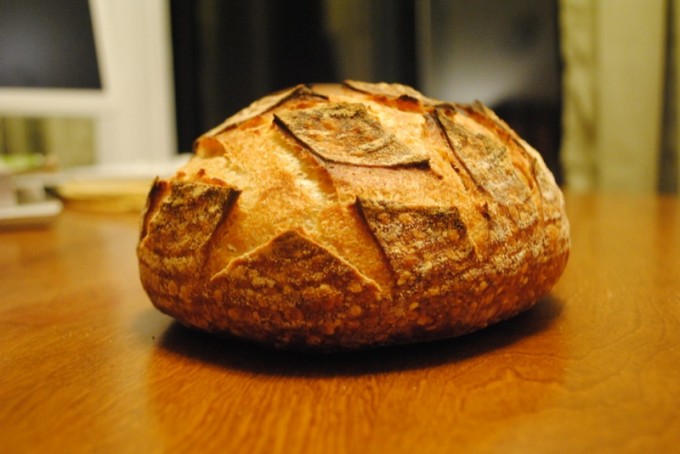
- It must not be baked too darkly. This is another area where my preferred bread style comes into conflict with the SF sourdough. Usually I like to give my breads a fairly dark bake, which gives the crust more flavor and a more pleasing look. But a SF sourdough is baked on the lighter side, almost a blond color. I had some trouble resisting a dark bake so my loaf came out a bit darker than I think I true SF sourdough should be. Oh well.
How to Make the Bread Sour
Many many people think that San Francisco sourdough can only be made in San Francisco because of the unique yeasts in this area. Well let me tell you right now that this is wrong! A good San Francisco Sourdough can be made anywhere! I should also point out that the sourness in sourdough bread comes, primarily, from a bacteria called Lactobacillus and not yeast. Lactobacillus is found all over the world so even if you live 5,000 miles from San Francisco you have no excuses for not making a great SF sourdough.
Really what it's all about is controlling the time and temperature of your fermentation. In general, the longer we ferment our dough the more sour it becomes. Also, the colder we keep our dough(To a point, the dough must not be so cold that it stops fermenting all together) the more sourness the bacteria will produce. So when we make our SF sourdough we are going to attempt to extend the fermentation period for as long as possible. Luckily cold temperatures will help us do this, killing two birds with one stone.
Another way of increasing sourness is by using a stiff, as opposed to liquid, starter. A stiff starter creates an environment that is more attractive to the kinds of bacteria that are responsible for creating a sour flavor. We will further increase our sourness by adding a small amount of rye flour to our starter. Rye flour contains a larger amount of bacteria that will increase sourness. You may be thinking "But rye flour isn't white flour! You are breaking the rules of SF sourdough!" While this may be true, we will be adding it in such a small amount that it will be almost undetectable in the loaf but will likely boost the sourness level, a trade off that I think is okay to make.
So, to increase sourness we will:
- Extend the fermentation of the dough as long as possible.
- Keep the dough at a cold temperature for a good chunk of the fermentation.
- Use a stiff starter with a bit of rye flour in it.
- Mix ingredients until thoroughly combined. Desired dough temperature: 70F
- Ferment for 18-24 hours. Fermenting this extended time will really amp up the sourness the starter brings to the loaf.
- Thoroughly combine all ingredients by hand in a mixing bowl. Desired dough temperature is 78F. Once all ingredients are combined let the dough rest, covered, for 5 minutes.
- Give the dough one fold ever 5 minutes for the first 15 minutes of bulk fermentation as described in lesson one.
- Bulk ferment the dough for 2 to 2.5 hours with one more fold at the one hour mark.
- Pre-shape the loaf round as described in lesson one and let the dough rest for 25-30 minutes.
- Final shape the loaf round the same way you just did the pre-shape but perhaps a little tighter. Put the dough seem side up in a round basket dusted with a 50/50 white flour/rice flour mixture.
- Let the dough sit out another half hour or so before putting in the fridge for 18-24 hours. This is where we really extend the dough's fermentation period.
- Heat your oven to 450 degrees and prepare your oven steaming method. I prefer to bake in my cast iron combo cooker
as I think it is the easiest most consistent way to yield professional like results in a home oven.
- Score the loaf as desired and bake for 30-35 minutes with steam for the first 15.
- Remove the loaf from the oven and let cool for at least 20 minutes
Formula - San Francisco Sourdough
Stiff Starter
| Baker's % | Ingredient | Grams |
|---|---|---|
| 85.00 | Flour | 53.00 |
| 15 | Rye Flour | 9.00 |
| 50 | Water | 31.00 |
| 25.00 | Stiff Starter | 15.00 |
| 226.80 | Total | 500.00 |
Final Dough
| Baker's % | Ingredient | 500g. Loaf |
|---|---|---|
| 100.00 | Flour | 220.00 |
| 74.00 | Water | 164.00 |
| 2.80 | Salt | 6.00 |
| 50.00 | Stiff Starter | 110.00 |
| 226.80 | Total | 500.00 |
Process
Results
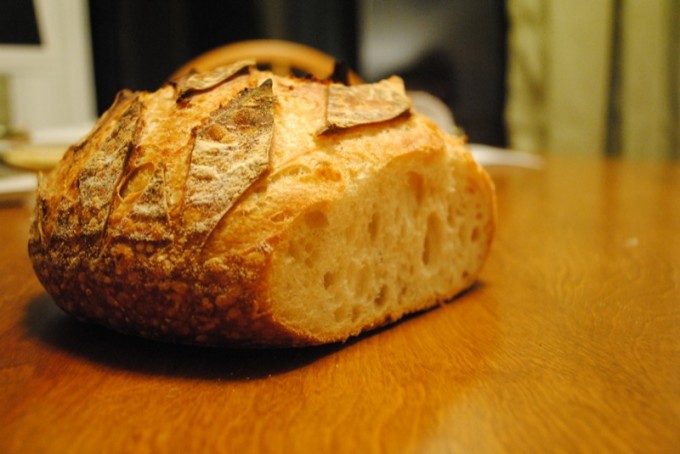
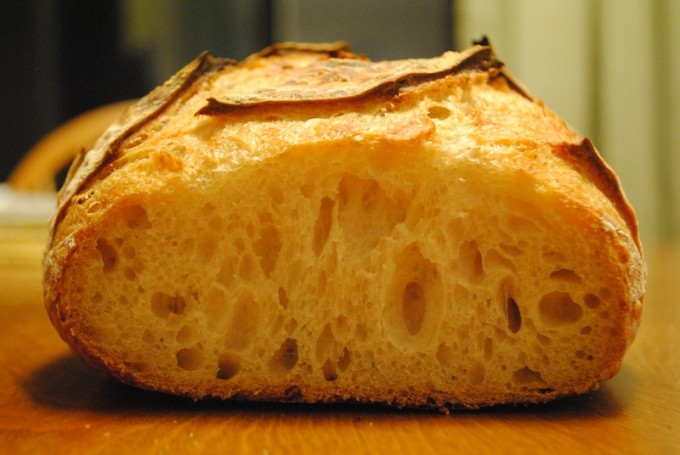
I was quite pleased with how my attempt at San Francisco sourdough turned out! The long fermentation of both the starter and the final dough proved to be an effective way to sour the loaf. This thing is nicely sour. The crust is well blistered but perhaps a tad too dark by SF SD standards. Now if only I had some soup to put in it...
